Showing posts with label design. Show all posts

Wednesday, February 19, 2020

Learning with Minecraft EDU

I've been learning more about Minecraft Education Edition this year and I was excited to visit a Grade 8 class where the students were using this tool for a social studies project.  Mr. Obach's class designed civilizations using Minecraft EDU to demonstrate their learning.  They were asked to address work & trade, architecture, food sources, sustainability and natural environment in their designs. Students were also expected to explain how the environment impacts the civilization.

When I was learning to use Minecraft EDU in my training sessions this fall, I was pretty slow at building and sometimes frustrated when I couldn't quite get things to work.  I failed often.  I was certainly no expert in building with Minecraft.  However, I could see the awesome potential for students to design and create with Minecraft.  I also really liked the Education Edition add-ons such as the camera, book & quill to make it easy for students to document their learning.  

When I met with the Grade 8 class, some of them had previous experience with Minecraft and some did not.  We introduced Minecraft EDU and gave students a bit of time to try it out.  I was impressed with how quickly and easily all students learned the tool and got right to creating their designs.  When I visited the Grade 8s again, they were efficiently collaborating with a partner in a "shared world" to build different elements of their civilizations.  When I asked those students who hadn't used Minecraft about their experience, they told me that they'd found it was easy to get started and fun for them, even though they'd had to figure out a new tool. 

During one classroom visit, students gave me a "tour" of what they'd built .  I was blown away!  They had created incredibly detailed and thoughtful projects.  They explained reasons for creating their civilizations in certain ways and told me about various elements they'd included.  Here are a few pictures of what I got to see that day:


"While I was working on my civilization, I had a lot of fun. I had fun exploring the world I chose and there were so many areas to choose from. Advantages of using this would be that you could let your mind go wild. I really enjoyed working on Minecraft." - Grade 8 student


As part of their assignment, students used the camera and Book & Quill features in Minecraft EDU to document and share their learning.   Check out a few samples from their documentation and notice the variety of elements that were included in their civilizations.


Friday, January 31, 2020

Designing Digital Posters with Binscarth Grade 7/8

I had the opportunity to work with an awesome group of Grade 7 and 8 students at Binscarth School last week.  This group of students used Canva to design digital posters related to the concepts they are studying in science class.   The posters turned out really well, so I asked students for permission to share their work here on my blog - you can see their designs below!

Designing digital posters is about more than just learning to use technology tools.  This project integrated important Literacy with ICT skills and science knowledge.  

  • We began by co-constructing criteria for our work, which relates to LwICT outcome P-1.2 participates in establishing criteria for own work. 
  • Next, students had to select a concept/term from their science studies and develop a description/definition of the term (which links to science outcome 8-3-01 Use appropriate vocabulary related to their investigations of fluids and LwICT outcomes G-1.1 gathers information from given source(s) and G-2.1 identifies relevant information from sources)
  • Then, students had to select images that related to their concept and design a poster that conveyed the meaning of their concept/word (which links to the "Produce to Show Understanding" section of our LwICT continuum, particularly P-2.1 uses a given format to demonstrate learning and P-3.1 edits work based on feedback from teacher and/or peers, according to established criteria, conventions, and/or standards). 
  • The final designs turned out really great!  Plus, I think that students will be able to use their knowledge of how to design digital posters as a way of sharing their learning for other projects and activities.  


P.S.  Canva recently announced free premium accounts for educators - get the details here!

Wednesday, May 23, 2018

Produce to Show Understanding: Designing Digital Posters

In Manitoba, we have a Literacy with ICT model for 21st century learning.   Our aim is to support students in developing skills to think critically and creatively using ICT .  One of the Literacy with ICT resources available is a continuum of skills.   The continuum includes goals for students to "Produce to Show Understanding".   We want students to demonstrate understanding of their learning, which can be achieved using a variety of formats.   In addition to the more traditional ways that students can share their knowledge, there are many ways that students can share their learning using technology.   One option that I have explored in PWSD classrooms this year is having students design digital posters to demonstrate their understanding. 

Possibilities
When supporting the use of technology in our school division, I aim to be responsive to the goals and needs of students and teachers.  I try to find ways for technology to support or enhance the learning already happening in classrooms.  Supporting students with designing digital posters is an activity that fits well with a variety of learning activities.   I've worked with students and teachers to create digital posters for a variety of subjects/topics.  Here are a few examples:
  • designing posters to share highlights from a social studies inquiry topic such as Canada's North
  • producing digital posters with key information about endangered species as part of a research project 
  • creating movie posters based on a novel
Thinking Critically and Creatively 
Students engaging in the task of designing digital posters often have to summarize or parse down  information, which is an important critical thinking skill.   They also have to make design decisions about font, images, spacing and style.  Designing a digital poster requires creative skills just like designing on paper!   

Going Beyond the Classroom
I'm passionate about students sharing their work beyond the classroom, so I really like that these posters can easily be shared with a wide audience.   Some classes have shared their work on social media and some have allowed me to share their work here on my blog and/or on my social media channels.   Digital posters can easily be uploaded to a variety of platforms for sharing.  This relates to another dimension of our Literacy with ICT continuum, focused on communication.  We want students to be able to share ideas, information and work.

Tech Tools
Students designing posters on iPads used PicCollage.  Students designing on computers created student accounts at Canva.  I encourage students to source public domain images from Pixabay (web or app based) or similar sites. 

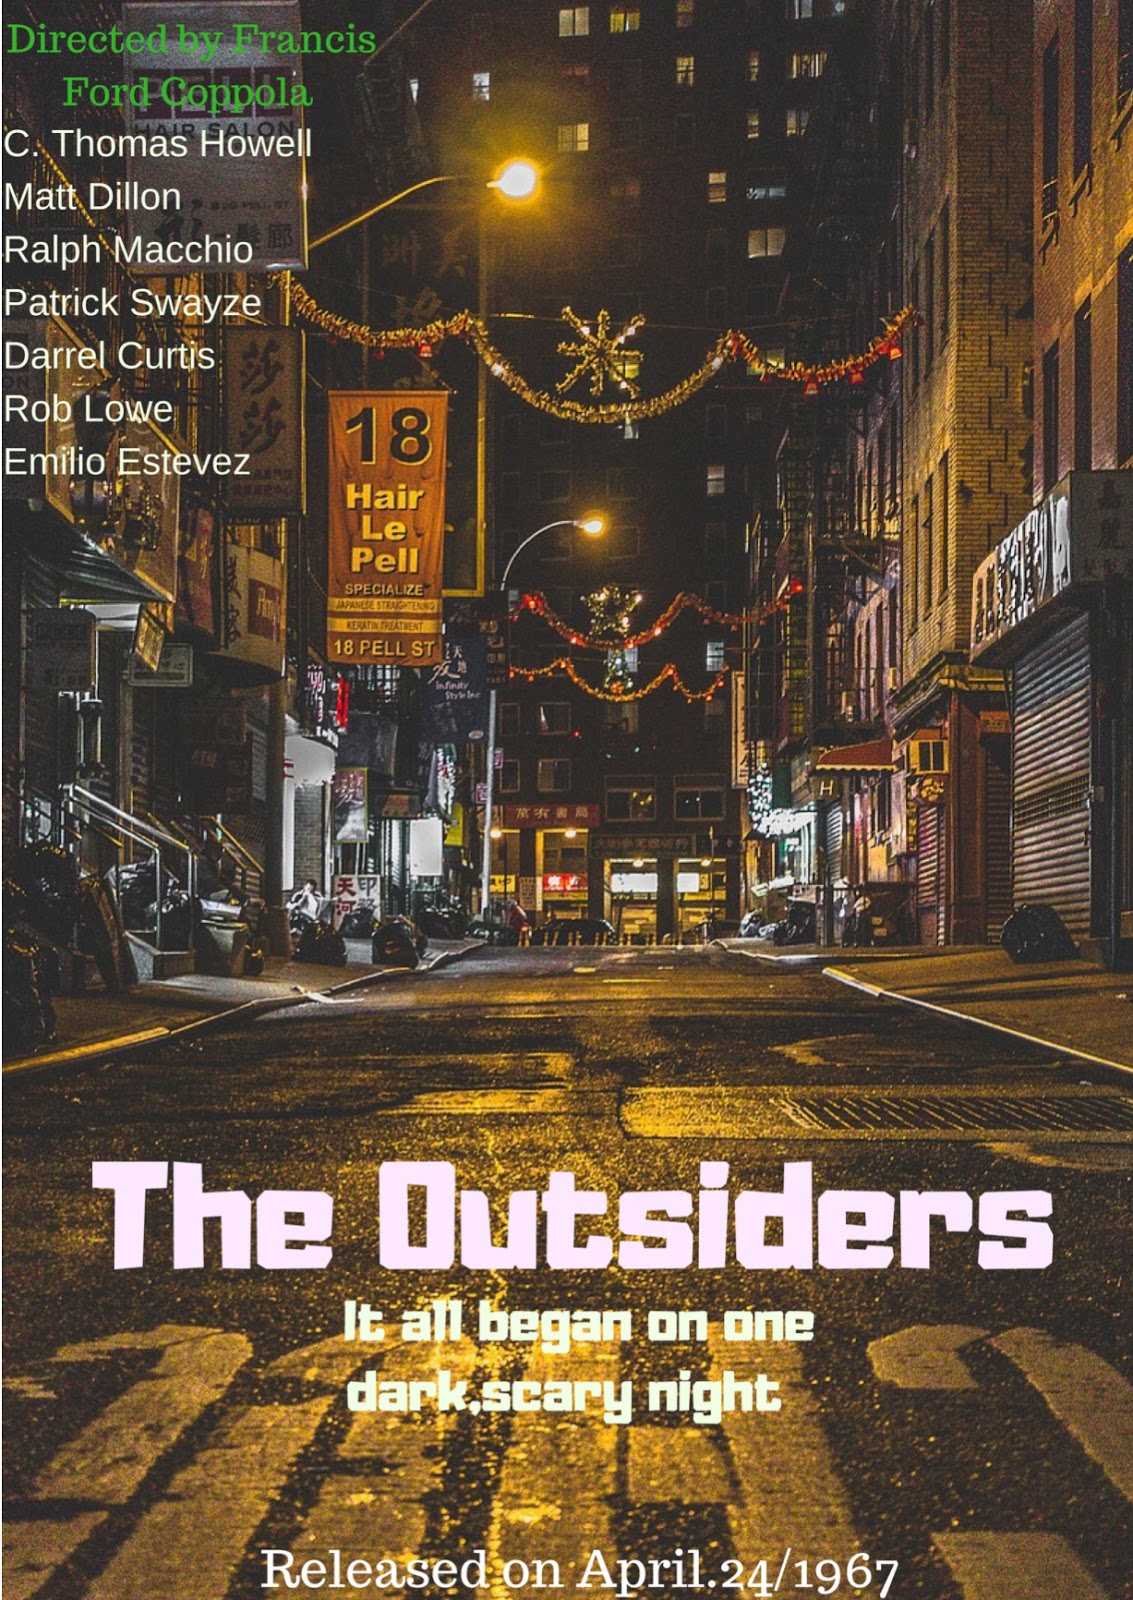
Student Samples: The Outsiders
I worked with Mrs. Dyck's ELA class at Strathclair Community School this month to support them in designing digital movie posters.   The class had just read the novel The Outsiders by S.E. Hinton and Mrs. Dyck tasked them with designing a catchy poster for the video version.   Students were asked to research the actual cast, release date and producer of the film and then to use their creative talents to develop a tag line.  Students were encouraged to make their designs visually appealing and easy to read.  Check out their work below!


Thanks to Mrs. Dyck's class for sharing your work!

Tuesday, June 21, 2016

Minecraft Animal Homes

This year, a group of Canadian Microsoft Expert Educators have been working on using Minecraft for learning.  I was inspired by the other educators ideas for using Minecraft in the classroom, so I decided to give it a try with my grade 1 students.  One of our science outcomes is that students will be able to design a representation of a habitat/home that meets the needs of a Manitoba animal, so our Minecraft design challenge focused on that.  We learned about the characteristics and needs of living things as we worked on this project.  Below I have outlined the steps we took in this project.

Brainstorming: Our whole class worked together to brainstorm a list of Manitoba animals.

Setting criteria: We worked together to set criteria for what our animal home designs should include. 

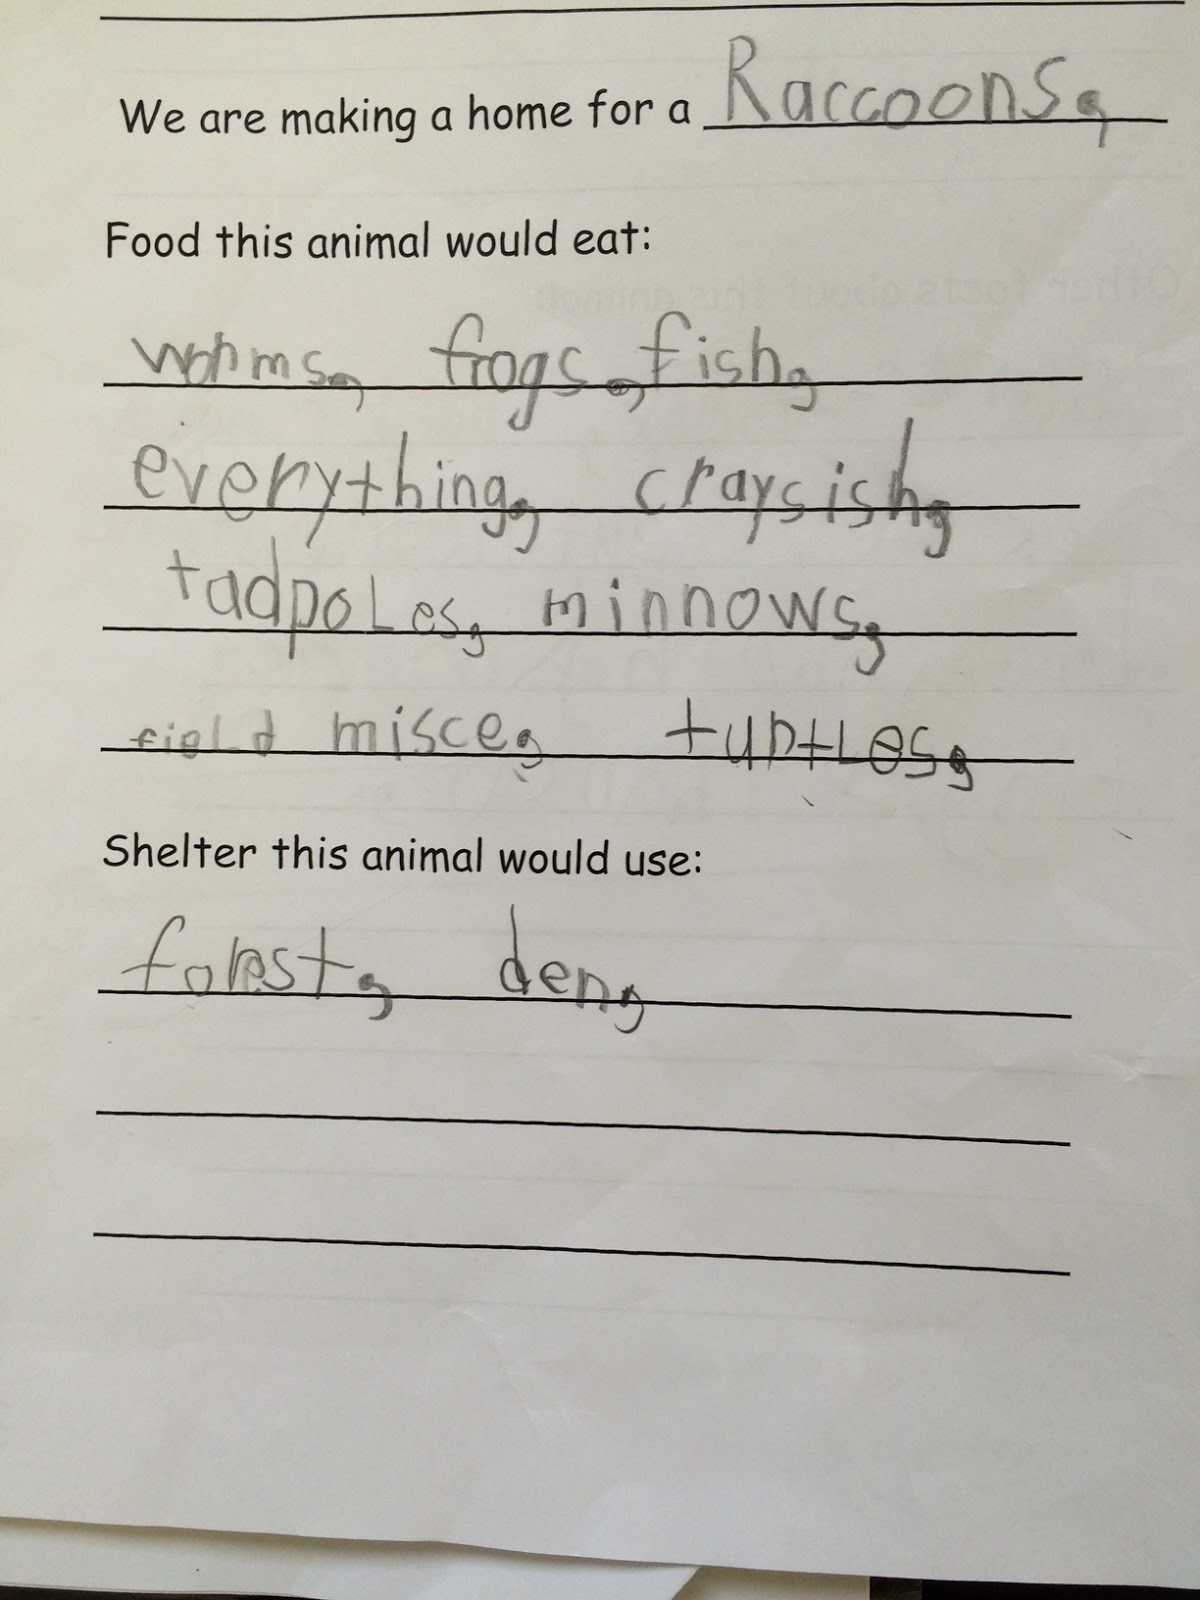
Research: Once we set criteria for the task, I put students into small group and they selected an animal from our list to research.  Groups of three students researched what that animal would need for food and shelter and completed the provided template.


Designing:  Next, students used what they learned in their research to design a representation of an animal home for their animal.  As students did this, I was able to walk around the room and have discussions with students about why they were making certain design choices and how their habitats would meet animal needs.  From those conversations, I could tell that my students had already learned a lot.


Sharing: We tried to present our Minecraft worlds on our interactive whiteboard, but that presentation style didn't work well, so we came up with a new plan to share our work.  Each group took a few screenshots to highlight how their habitat design met the basic needs of their animal.  They added short captions to each screenshot and then created short videos which were shared with the whole class.


Monday, February 3, 2014

Olympics Postcard Designs

We have continued to work with our friends in Oak Lake Kindergarten and our families at home to learn about the Olympics.  Many students have made guest blog posts sharing their home research and we have also done some posts together as a class.  Students worked in small groups to build knowledge of the Olympic sports and recorded their new understandings using research organizers. 

While we were on a Skype call discussing our project with the Kindergartens, students had the neat idea to send something to Olympic athletes.  They suggested the ideas of sending pictures and messages, so we decided to make postcards with pictures on the front and messages on the back.  We set criteria for our work so that we'd know what our goals were, then we got to work designing our postcards.   The Kindergartens had used Autocollage before, so they thought it would work well for designing the front of our postcards.   We used our art work photos to make cool collages.  Then we had to design the back of our postcards to meet our criteria.  We wanted :room to write, a spot for a stamp, space for an address and a QR code linked to the Little Hands Extended blog so people could find out more about our project!

Watching our collages come together in Autocollage was a lot of fun!  Making room for everything on the back of our postcards was tricky, but we managed to make it work.  We even had to do some problem solving and re-designing when Mrs. Caldwell pointed out that our original design had the QR code in the spot that the post office would use.  We made changes and our final product looks great, we can't wait for the printed postcards to arrive!


Friday, November 29, 2013

Farmer Appreciation Day: Poster Making & Set Up!


Students wanted to create special posters for decorating our classroom on Farmer Appreciation Day.  We brainstormed messages together and students decided whether they'd like to work with others on big banner posters or individually on smaller posters.  Students worked really hard to do their best printing, drawing, designing and coloring.

 Yesterday afternoon, we started setting up for the event.  We moved the furniture around in our room to get ready for our farmer guests and we started putting up our posters.  It sure looks great in our classroom and I'm so proud of the students for their amazing learning, teamwork and passion! 

Whether it was lifting tables, stacking chairs, setting out cookies or last minute poster-coloring, everyone pitched in to get ready!  We even had a student photographer take pictures to show our setup day.  I helped out with counting chairs, "directing traffic" and reaching some hard-to-reach spots for posters.  Otherwise, the students did most of the work.  They are really engaged in their learning and excited about their project!